Adding an article on rampersads.com
It’s quite easy to add an article to the website, but there is some explanation needed.
First off:
Articles are docked in categories and categories are docked in section.
On rampersads.com there is, at the moment, one section “rampersads” in the section there are several categories. When adding an article, be sure to place the article in the most suitable category.
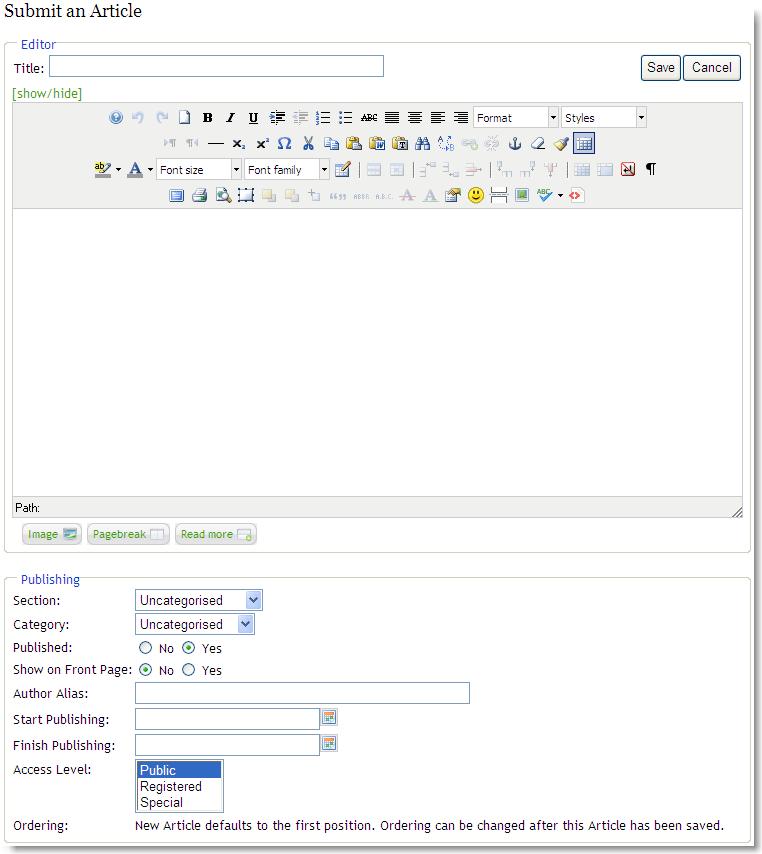
When adding an article you would be presented with the following screen. Bellow you would find a small explanation of the different areas.

Editor details.
- Title. The Title for this article. This may or may not display on the page, depending on the parameter values you choose.
- Section. Section for this article. If no section is chosen the article would be in the section Uncategorized.
- Category. Chose the category from the drop-down list. The lists of categories are related to the section chosen. . If no category is chosen the article would be in the category Uncategorized.
- Published. Whether or not this article is published. Select Yes or No from the radio button group to set the Published state for this item. If the article is not published it would not be visible on the site.
- Show on Front Page. Whether this article would be visible in the sites front page.
- Author Alias: An alias for the author.
- Start Publishing: Start date for publishing the article. You do not need to fill in this field unless you want to change the start date for the visibility of the article.
- Finish Publishing: The date when an article is no more visible.
- Access Level. Who has access to this article! Current options are:
o Public: Everyone has access
o Registered: Only registered users have access
o Special: Only users with author status or higher have access
Enter the desired level using the drop-down list box.
- Ordering: After saving the article you could adjust the ordering of the article in the category you chose. So if there are five articles in the category you could set the order with this option.
Past from Word button.

If you are copying an article that was made in Word, it would be better to use the paste from word button.
Adding photos:
It is possible to add photos to your articles but…. yes there is a but. Because of the amount of web space available, the photos must be resized to a smaller format. If you know how to do that, go ahead and resize your photos. A maximum of no more than 850kb per photo is the (my) limit. If the site gets too full we would probable have to remove some photos.
This is how I resize and add my photos to my articles.
Resizing photos:
I’ve installed a power toy to XP that allows me to resize a photo with the right click of the mouse. You could find the XP toy here.


Now you could save you article.